Fossil loan kits
We have several fossil kits available to loan to schools and educational organisations. These fossil loan kits are free to use and can be borrowed for up to 4 weeks.
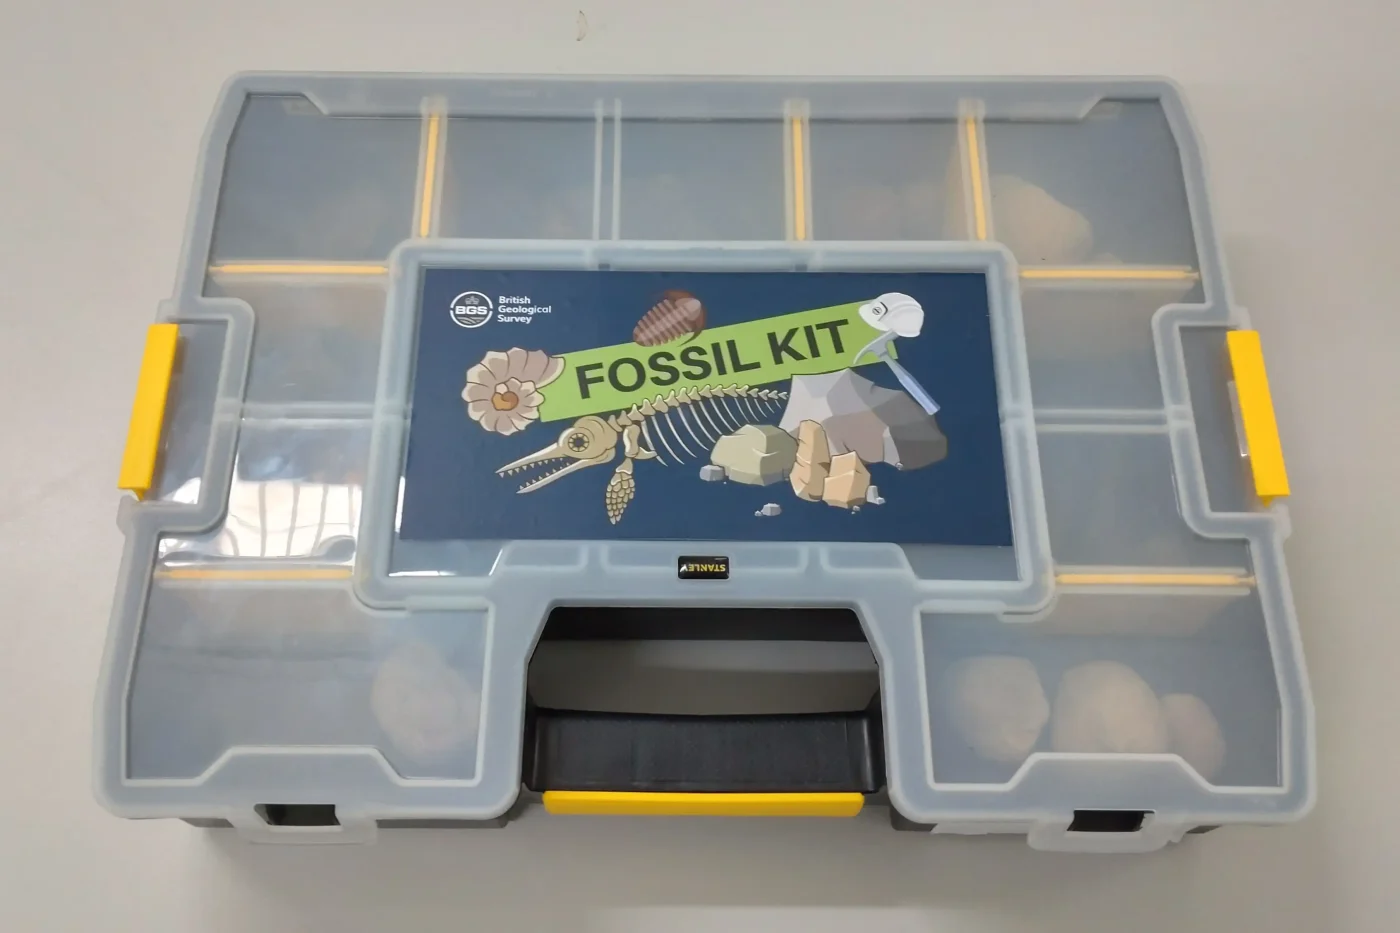

Fossil kit box. © BGS / UKRI
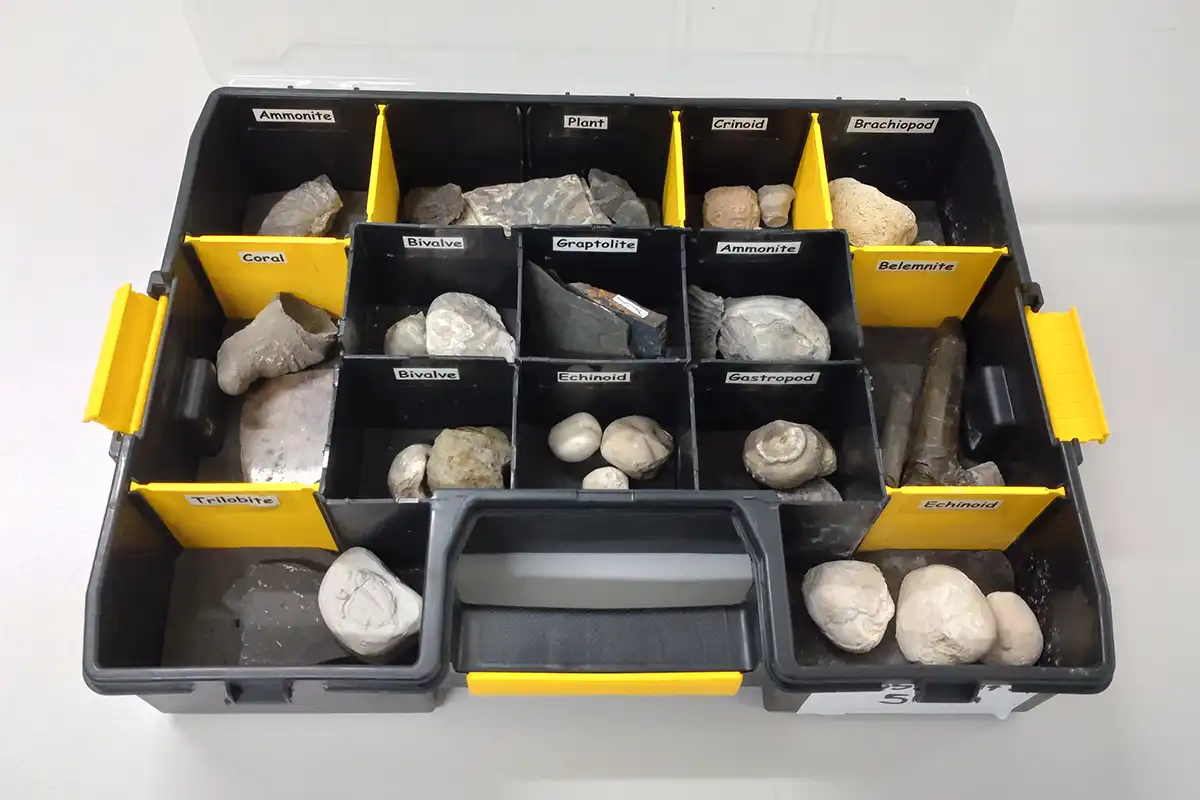
Inside the fossil kit box. © BGS / UKRI
Your fossil kit will come with a printed copy to use as a matching game with the rock samples, but you can also download the fossil info sheets.
Dinosaur puppets and colour in geological timelines
You can download, print and make a number of paper dinosaur puppets to play with or colour in a geological timeline to hang in your bedroom or classroom.
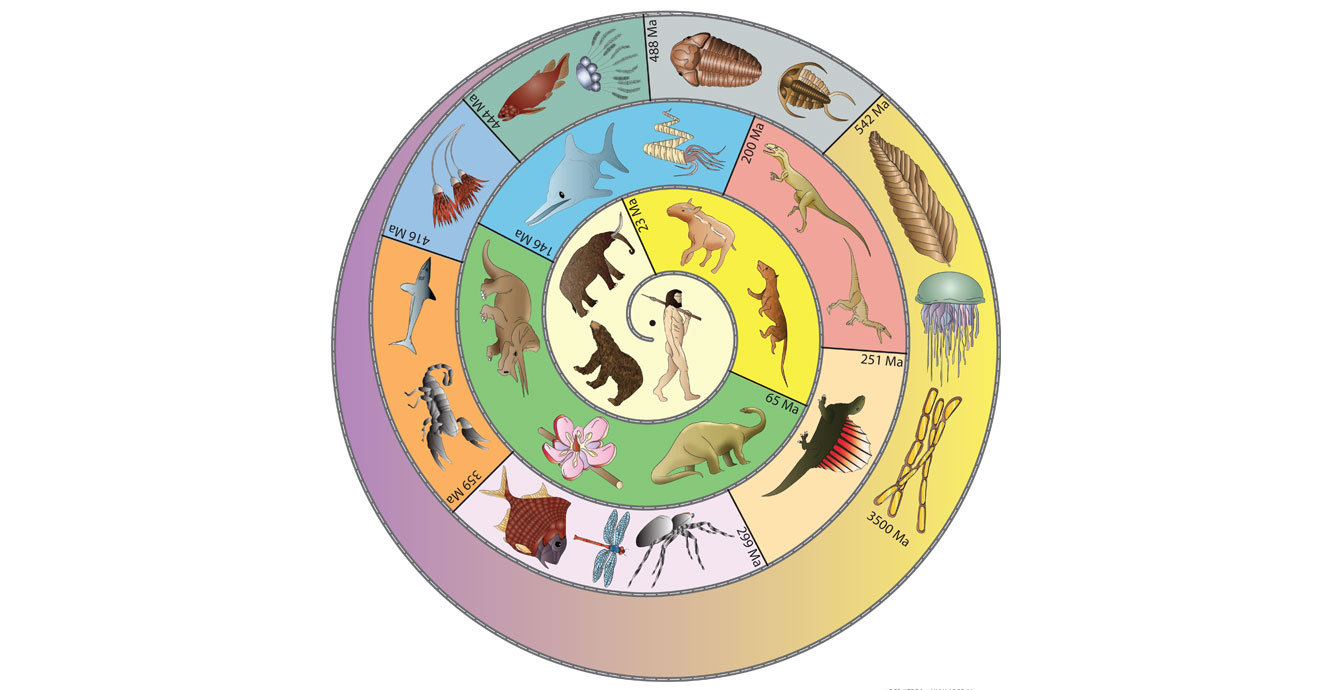
Spiral timeline
The spiral timeline illustrates some of the animals and plants that have lived at different periods in Earth’s history, from the earliest life to human beings.
Download, print and cut out the spiral timeline mobile and hang from a bracket or ceiling.
- Black and white spiral timeline: choose your own colour scheme before making the mobile 11.35MB pdf
- Colour spiral timeline: ready to cut out 19.76MB pdf
The spiral timeline was designed and published jointly by BGS and the National Museum of Wales.
Colour and cut-out Spiral Timeline. BGS © UKRI.
Hand puppets and models
Pterosaurs were flying reptiles that lived between 210 million and 65 million years ago — the same period of time that dinosaurs were alive. The smallest pterosaurs were about the same size as a chaffinch, while the largest had a wingspan of 10 m or more, making them one of the largest flying animals that have ever existed. Many pterosaurs had teeth and elaborate crests on their skulls.

Download and assembly instructions
What you will need:
- printed copy of the pdf file
- glue or sticky tape
- scissors
- split-pin paper fasteners
- Download the cut-out puppet of the pterosaur in colour 348 KB pdf or in black and white to colour in 240 KB pdf.
- Cut around the four parts of the model — you may need to get an adult to help you.
- Head and lower jaw: fold down along the centre lines.
- Pierce black dots with a pencil, then attach lower and upper jaws together with the split pins.
- Glue a finger loop to the head and another to the lower jaw.
Pterosaur puppet assembly instructions. BGS © UKRI.
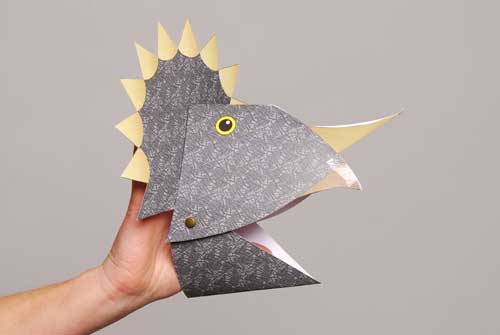
Styracosaurus was a plant-eating dinosaur that lived about 75 million years ago in the part of the world we now call North America. Styracosaurus means ‘spiked lizard’ after the long horns on its neck frill and nose. It even had small horns on its cheeks. Its body resembled a rhinoceros and would have been about 5.5 m long.
Download and assembly instructions
What you will need:
- printed copy of pdf
- glue or sticky tape
- scissors
- split-pin paper fasteners
- Download the cut-out puppet of Styracosaurus in colour 409 KB pdf or in black and white to colour in 261 KB pdf.
- Cut around the six parts of the model — you may need to get an adult to help you.
- Spikes: fold the flaps inwards.
- Head, horn and lower jaw: fold in half along the line.
- Glue the horn to the inside end of the nose.
- Glue the spikes to the inside of the head using the tabs.
- Finger loops: bend into a cylinder and glue or tape.
- Pierce the black dots with a pencil, then attach the lower jaw and head with split pins.
- Glue or tape a finger loop to the top jaw and another to the lower jaw.
Styracosaurus puppet assembly instructions. BGS © UKRI.
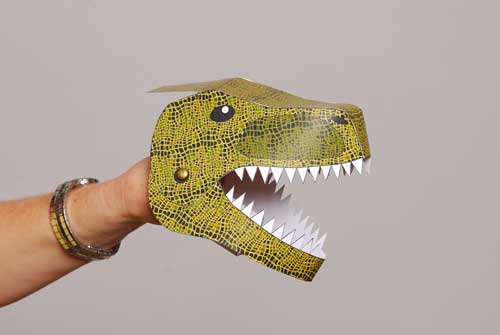
Tyrannosaurus rex lived about 67 million to 65 million years ago in what is now called North America. It was a meat-eater and nearly 13 m long standing upright on its powerful hind legs. Although its front legs were tiny by comparison, there is evidence that they were also strong and muscular, perhaps for holding on to its prey. Its teeth could be up to 30 cm long and were shaped rather like bananas.
Download and assembly instructions
What you will need:
- printed copy of pdf
- glue or sticky tape
- scissors
- split pin paper fasteners
- Download the cut-out puppet of Tyrannosaurus rex in colour 509 KB pdf or in black and white to colour in 329 KB pdf.
- Cut around the four parts of the model — you may need to get an adult to help you.
- Head: fold the flaps inwards and fold the ends of the upper jaw towards each other and glue to the top of the head.
- Lower jaw: fold along the score lines near the middle of the head.
- Finger loops: bend into a cylinder and glue.
- Pierce the black dots with a pencil, then attach the lower jaw to the head with split pins.
- Glue a finger loop to the top jaw and another to the bottom jaw.
Tyrannosaurus rex puppet assembly instructions. BGS © UKRI.
Models
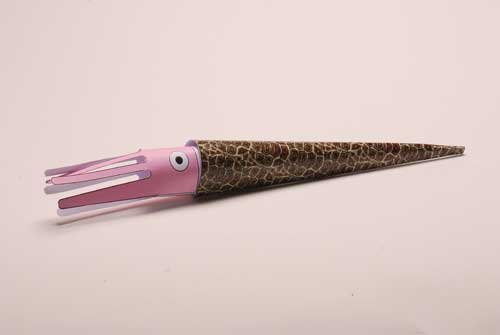
Orthocone nautiloids were extinct ancestors of the tightly coiled pearly nautilus that is still found swimming in the deep oceans. Orthocones were also distant relatives of extinct ammonites and modern squid and octopus. Orthocones lived from about 500 million years ago until nearly 200 million years ago. The soft body and tentacles are rarely preserved as fossils, but the hard shells are often fossilised in large numbers.
Download and assembly instructions
What you will need:
- printed copy of the pdf
- glue or sticky tape
- scissors
- Download the cut-out model of the orthocone nautiloid in colour 149 KB pdf or in black and white to colour in 95 KB pdf.
- Cut around the two parts of the model — you may need to get an adult to help you.
- Head: fold the flaps inwards.
- Bend into a cone shape and glue the long flaps together.
- Shell: fold along the flap.
- Bend the shell into a cone shape and glue along the flap.
- Glue the head to the inside of the shell.
Orthocone nautiloid model assembly instructions. BGS © UKRI.
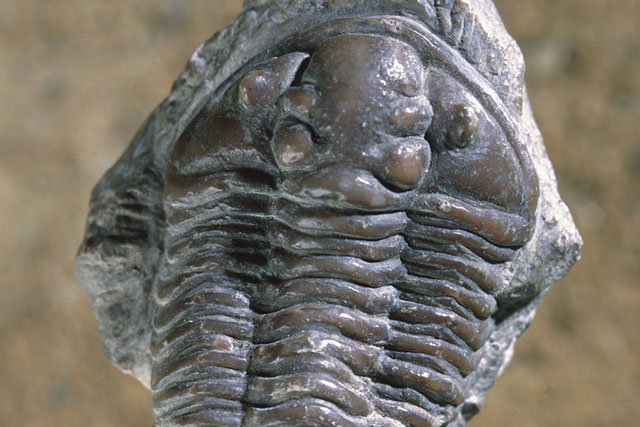
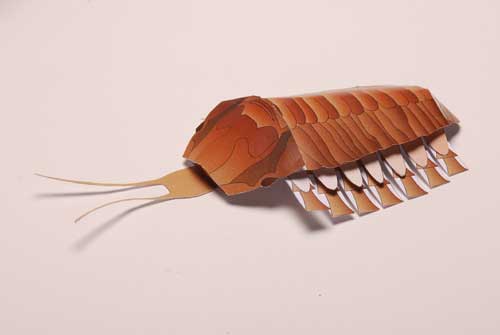
Trilobites were distantly related to crabs and lived in the sea from 526 million years ago until they became extinct 250 million years ago. There were many different species and 17 000 types of fossil trilobite have been found, ranging in size from only a few millimetres to more than half a metre in length.
Download and assembly instructions
What you will need:
- printed copy of the pdf
- glue or sticky tape
- scissors
- Download the cut-out model of the trilobite in colour 250 KB pdf or in black and white to colour in 150 KB pdf.
- Cut around the four parts of the model — you may need to get an adult to help you.
- Exoskeleton: bend into a slight curve and glue the flaps to the next part of the body.
- Antennae: fold along the line, then glue to the head end of the exoskeleton.
- Gills and legs: fold slightly along the and glue the under the gills.
- Glue the gills and legs under the shell.
Trilobite model assembly instructions. BGS © UKRI.
You may also be interested in

Discovering Geology
Discovering Geology introduces a range of geoscience topics to school-age students and learners of all ages.
Maps and resources
Download and print free educational resources.